Bug Reporting Workflow for QA Teams Using Screenshots and QR Codes
Published November 4, 2026 · 5 min read
QA teams spend a surprising amount of time moving bug evidence from one place to another. A tester captures a screenshot on a test phone, then needs to get it to a developer on a laptop across the room, or the other way round. A QR code generator closes that gap: it turns a screenshot link into a code anyone on the team can scan in seconds.
This short guide shows how QA teams can use QR codes in their bug reporting workflow, where the approach fits best, and what to check before relying on it.
Why bug reports need a faster path
A bug report is only useful when the right person sees the evidence quickly. Yet many reports stall because screenshots sit in a phone's camera roll, on a tester's desktop, or buried in a chat thread. By the time a developer opens the image, the context may be gone.
Screenshot links already solve most of this. A QR code adds one more shortcut for the moments when evidence has to jump between devices: a test phone, a tablet, a shared lab machine, or a printed sheet in a meeting.
How the workflow works
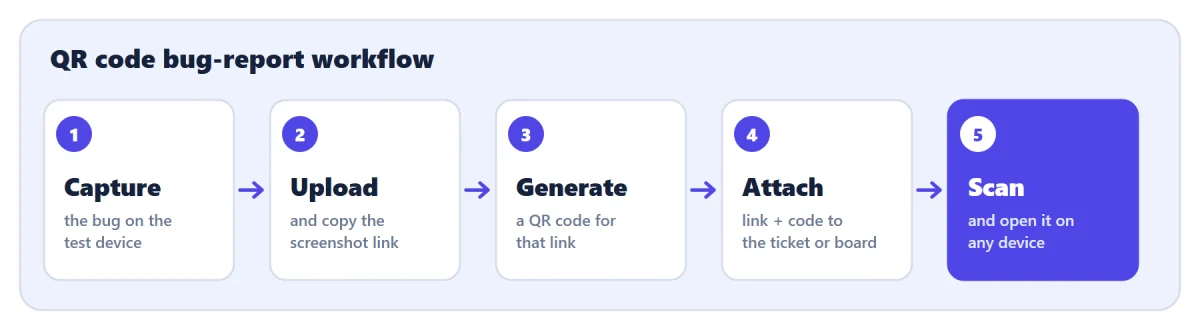
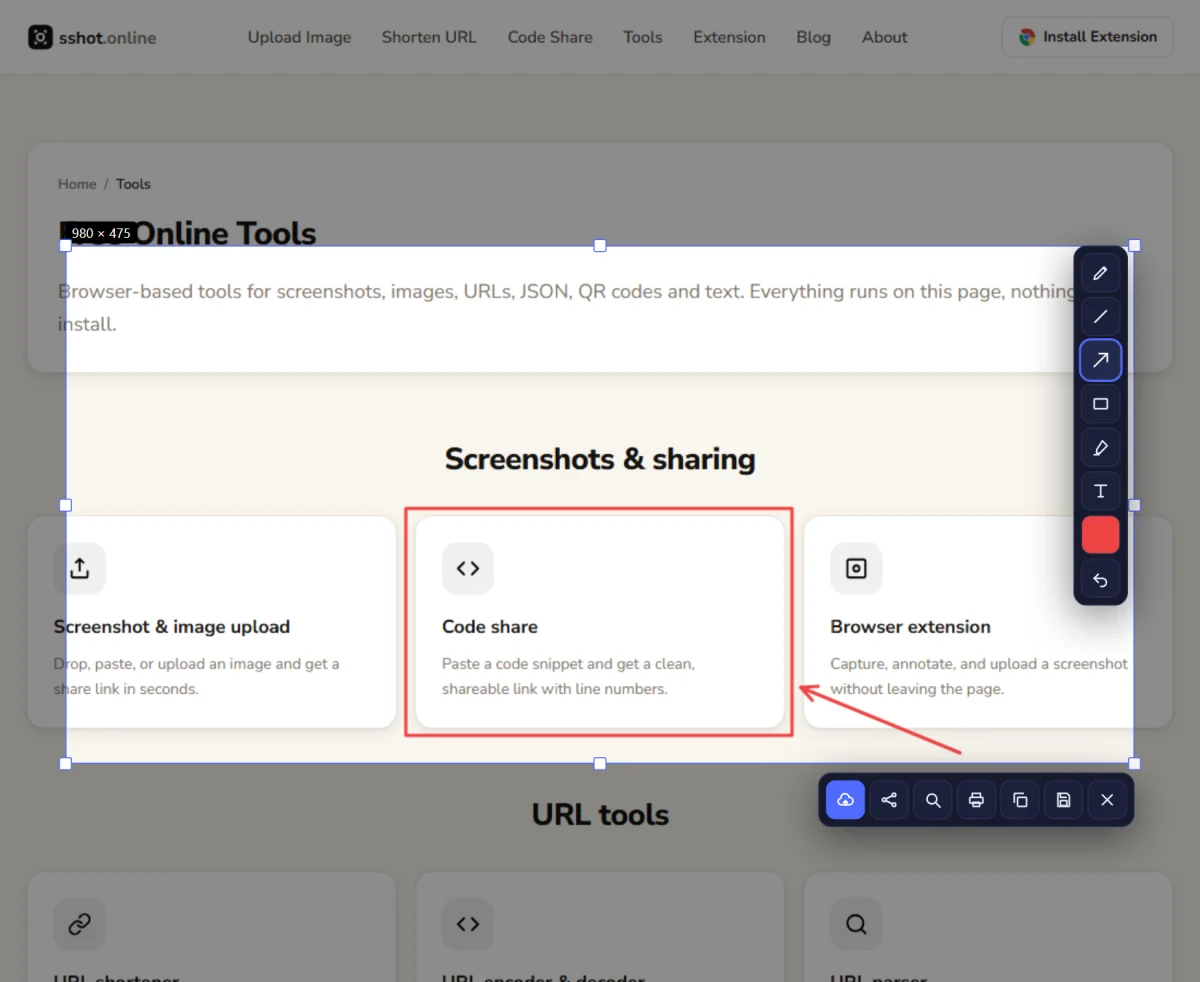
- Capture the bug. Take a screenshot showing the error, the screen state, and any visible messages. In a browser, the SSHOT Extension lets you mark the problem with a box or arrow before uploading.
- Upload and copy the link. Paste or upload the screenshot on SSHOT Online. This works from a phone browser too.
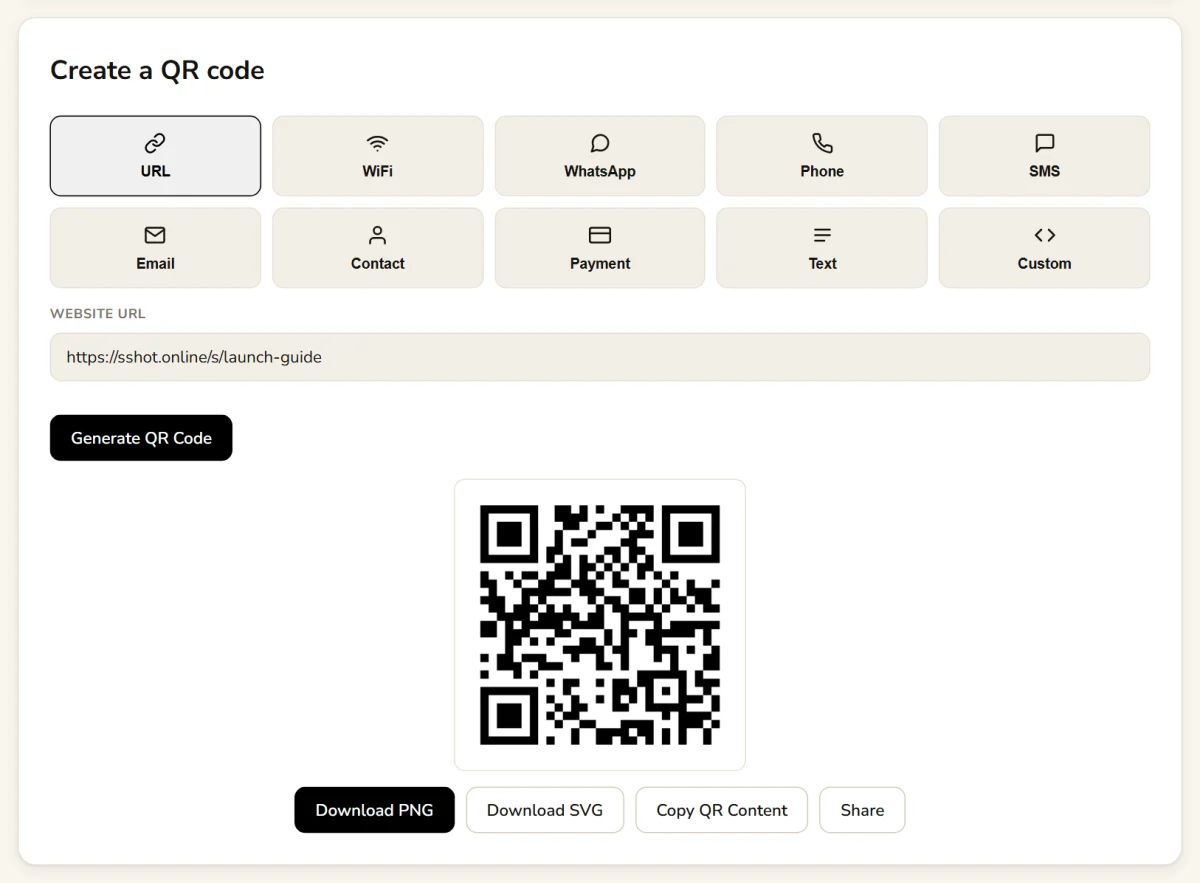
- Generate the code. Paste the link into the QR code generator and download it.
- Attach it to the report. Put the link in the ticket so it's clickable, and add the QR code wherever someone will look from a different device: the ticket description, a bug board, a printed review sheet, or a slide.
- Scan and review. The developer scans the code and the screenshot opens on their own device. No hunting for files, no "can you resend that?".
Where QR codes help most in QA
- Mobile testing: a tester on a laptop can show a QR code on screen so a developer opens the bug screenshot on the same phone model they're debugging on. It works the other way too: scan from a test device to open evidence there.
- Device labs and shared rigs: each code points to one fixed screenshot, so don't tape a code to a device and expect it to show "the latest" failure. Instead, label the device with a QR code for a page your team keeps updated, such as the device's ticket list or a team wiki page, and put screenshot codes in the individual bug reports.
- Hybrid teams: share a QR code on screen during a video call so remote developers can open the screenshot on their phone without waiting for a message.
- Bug review meetings: print a code next to each bug on the review sheet so attendees can open the screenshot during the discussion.
Tips for keeping your codes reliable
- Test every code before it goes into a ticket. Scan it with a phone and confirm it opens the right screenshot.
- Label each code with the bug ID or a short description, so nobody has to scan it to find out what it is.
- Keep codes readable. Print them at least 2 to 3 cm wide, with good contrast and clear space around the edges.
- New screenshot, new code. An uploaded screenshot can't be swapped for a different image. If you capture an updated screenshot, upload it and generate a new code.
- Keep the original file for long-running bugs. Attach the screenshot file to the ticket as well, so the evidence stays with the bug however long it stays open.
Conclusion
A QR code generator gives QA teams a fast way to move bug evidence from a test device to the people who need to fix it. Combined with screenshot links, codes shorten the path between discovery and diagnosis, especially in mobile testing, review meetings, and hybrid setups. Test each code, label it clearly, and keep the link in the ticket alongside it. Start with one workflow, such as mobile bug reports, and expand once the team sees the time saved.
Try the free QR code generator and create your first bug report code today.
Frequently asked questions
Can a QR code replace a full bug ticket?
No. A QR code is a shortcut to evidence, not a replacement for the report. Keep the steps to reproduce, environment details, and expected behavior in the ticket, and use the code to open the screenshot.
Do developers need a special app to scan the code?
No. Most phone cameras read QR codes directly. Point the camera at the code and tap the link that appears.
Is it safe to put screenshot QR codes on shared devices or printouts?
Only if the screenshot is safe to share. Anyone who scans the code can open it, so crop out passwords, personal data, and customer information, and test with dummy accounts where possible. To have an upload removed, contact us.
Can one QR code always show the latest screenshot?
No. Each code opens one fixed screenshot link, and uploads can't be replaced. For a code that stays useful over time, point it at a page your team keeps updated, such as a ticket list or wiki page.
What if a QR code doesn't scan on a label?
Print it larger, improve the contrast, leave clear space around it, and protect the label from glare and scratches. Confirm the link opens in a browser, then regenerate the code if needed.
Related articles

Bug Reports with Screenshots: QA Testing Guide
How QA teams use annotated screenshots to write clearer bug reports, speed up fixes, and set consistent documentation standards.
Read More →
QR Code Generator for Screenshots: Print and Scan Instantly
Turn a screenshot into a QR code anyone can scan: upload it, generate the code, download it for print, and test it before you hand it out.
Read More →
How to Use SSHOT for Bug Reports: Developer's Guide
Learn how to report bugs with screenshots for faster fixes, with a step-by-step process, best practices, and a ready-to-use bug report template.
Read More →